 Update some way on Facebook Blocked
We were not strangers who hear to "Facebook", including children from elementary school students even children in kindergarten until the old man. It has shown its very pervasive in our lives. A date for any reason as (face blocked or busy with work ...) is not on Facebook also makes you feel more missing something. The reason can overcome it when Facebook blocked by the fault of the network you use. Let's explore.
Here's a hint to help you break the "invisible wall".
1. USE COC COC
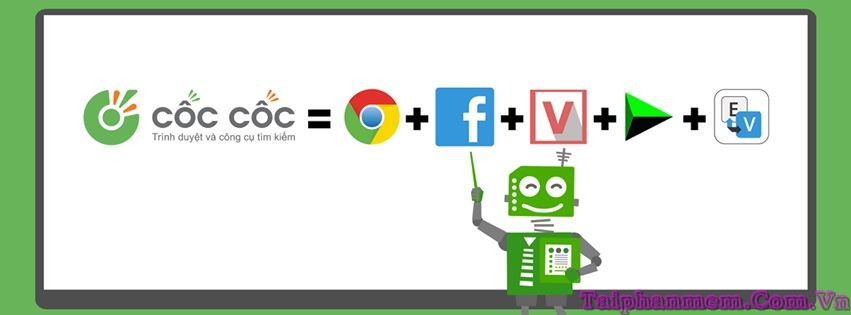
Coc Coc is a Web browser you use a lot with its superior features like Unikey and IDM . One of the remarkable features that are on Facebook without a single incident. Also Coc Coc is also close friends with those who like "mashed" movies, streaming music online.

2. DOWNLOAD THE SOFTWARE TO YOUR COMPUTER HOTSPOT SHIELD
You can download Shield Hosts Free to your computer. This way is extremely simple and you just need to download this software, and pop-up whenever possible use on facebook.
3. EDIT THE FILE HOSTS
You follow the instructions below:
B??c 1 - M? Notepad: Click vào Start Menu > All Programs > Accessories > Notepad. "Run as Administrator" ??i v?i Windows 7
Step 2 - Open the hosts file: In Notepad you to the menu File> Open . In the Filter box near the File name, select All and then on CWindowsSystem32driversetc to open the file called hosts .
Step 3 - Edit the hosts file: Following the end of the file and drag the mouse to enter . Finally copy the entire contents of the following at the end of the hosts file
173.252.110.27 facebook.com
173.252.110.27 www.facebook.com
173.252.110.27 www.login.facebook.com
173.252.110.27 login.facebook.com
173.252.110.27 apps.facebook.com
173.252.110.27 graph.facebook.com
173.252.110.27 register.facebook.com
173.252.110.27 vi-vn.connect.facebook.com
173.252.110.27 vi-vn.facebook.com
173.252.110.27 static.ak.connect.facebook.com
173.252.110.27 developers.facebook.com
173.252.110.27 error.facebook.com
173.252.110.27 channel.facebook.com
173.252.110.27 register.facebook.com
173.252.110.27 bigzipfiles.facebook.com
173.252.110.27 pixel.facebook.com
173.252.110.27 upload.facebook.com
173.252.110.27 register.facebook.com
173.252.110.27 bigzipfiles.facebook.com
173.252.110.27 pixel.facebook.com
173.252.110.27 logins.facebook.com
173.252.110.27 graph.facebook.com
173.252.110.27 developers.facebook.com
173.252.110.27 error.facebook.com
173.252.110.27 register.facebook.com
173.252.110.27 blog.facebook.com
173.252.110.27 channel.facebook.com
173.252.110.27 connect.facebook.com
173.252.110.27 bigzipfiles.facebook.com
Ho?c:
31.13.77.52 facebook.com
31.13.77.52 www.facebook.com
31.13.77.52 www.login.facebook.com
31.13.77.52 login.facebook.com
31.13.77.52 apps.facebook.com
31.13.77.52 graph.facebook.com
31.13.77.52 register.facebook.com
31.13.77.52 vi-vn.connect.facebook.com
31.13.77.52 vi-vn.facebook.com
31.13.77.52 static.ak.connect.facebook.com
31.13.77.52 developers.facebook.com
31.13.77.52 error.facebook.com
31.13.77.52 channel.facebook.com
31.13.77.52 register.facebook.com
31.13.77.52 bigzipfiles.facebook.com
31.13.77.52 pixel.facebook.com
31.13.77.52 upload.facebook.com
31.13.77.52 register.facebook.com
31.13.77.52 bigzipfiles.facebook.com
31.13.77.52 pixel.facebook.com
31.13.77.52 logins.facebook.com
31.13.77.52 graph.facebook.com
31.13.77.52 developers.facebook.com
31.13.77.52 error.facebook.com
31.13.77.52 register.facebook.com
31.13.77.52 blog.facebook.com
31.13.77.52 channel.facebook.com
31.13.77.52 connect.facebook.com
31.13.77.52 bigzipfiles.facebook.com
Step 4. You just keep on and off notepad
Step 5 Copyright, the browser you are using and check back on facebook.com page. So the "OK"
4.CHANGE DNS
Open DNS : 208.67.220.220 208.67.222.222 and
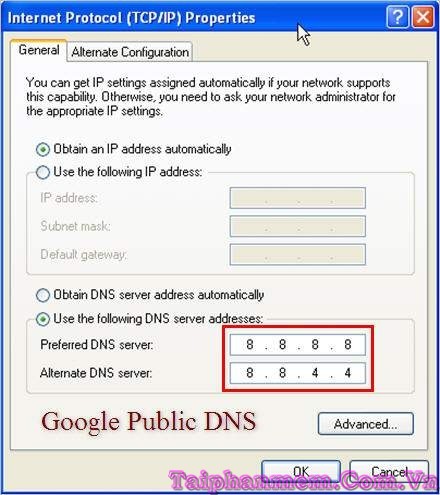
Google DNS: 8.8.8.8 and 8.8.4.4
Above are some addresses as DNS for your reference.

For Windows 7: Click the icon in the icon tray PCs bottom right of the screen. Click Open Network and Sharing Center => Change adapter settings . Then double-click the icon with the blue of connection, and select Properties .
For Windows 8 : First you start click to select Control Panel and Network and Internet.
Then select Network and Sharing Center and click select Change adapter settings.
Network selection and press Properties.
Appearing in Networking choose Internet protocol version 4 select Properties .
Mark DNS that you want to change to 2 frames "Preferred and Alternate DNS server" and press close to complete.
Then you go back to Facebook to check offline.

 Google Chrome Free...
166975
 MathType 6.9a -...
79843
 Zalo for PC
29681
 Beach Head 2002 -...
25836
 iBackupBot - Free...
22689
 AnonymoX 2.0.2 -...
22274
 Snipping Tool++...
20998
 Age of Empires 1.0
17145
 Realtek AC97 Audio...
16604
 Citrio...
14630