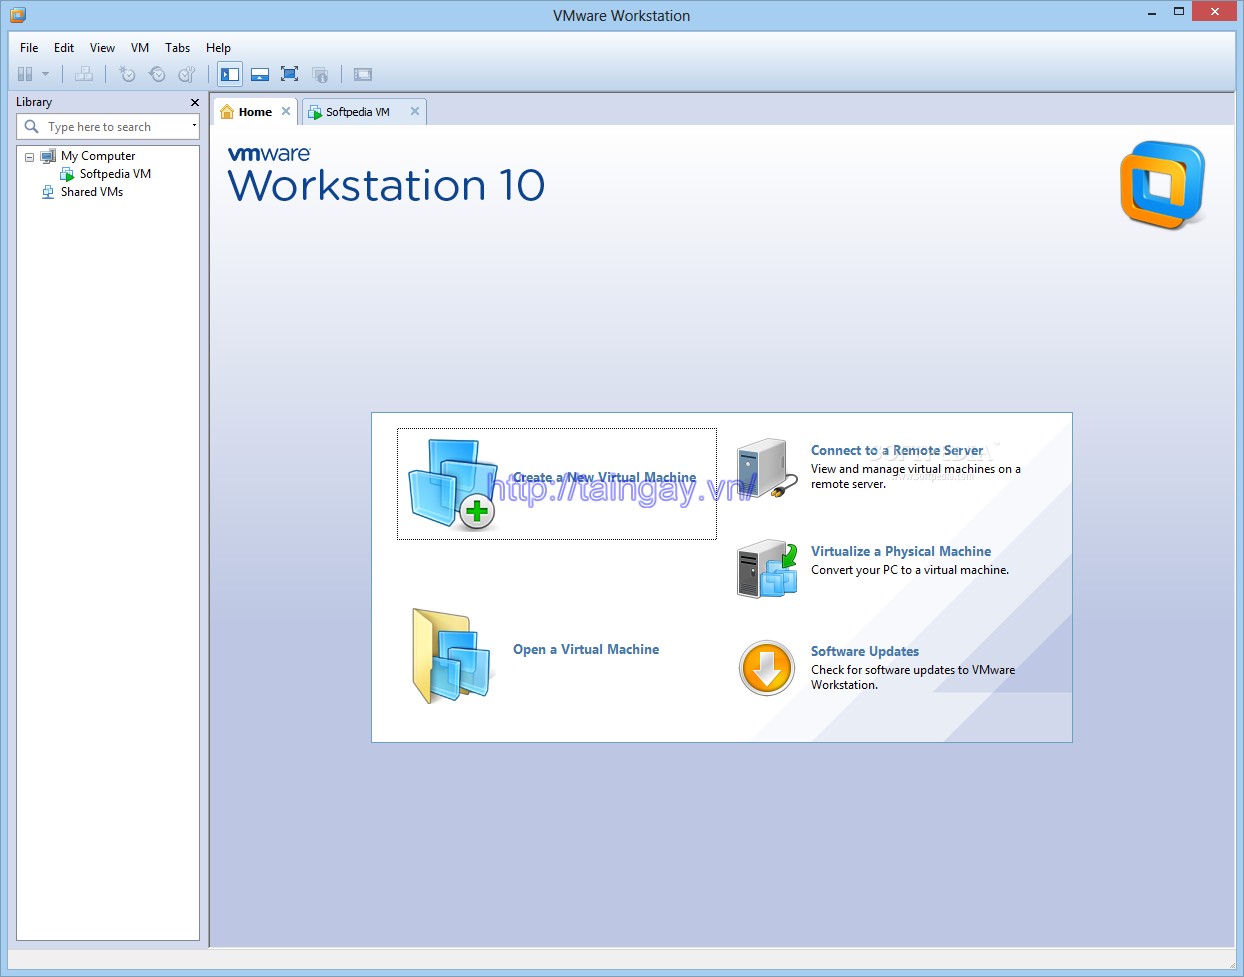
VMWARE WORKSTATION - SOFTWARE TO CREATE VIRTUAL MACHINES
VMware Workstation 11 is a software simulator desktop operating system of its famous VMware Inc. With more than 50 new features, can change the way we work with the virtual machine.
VMware Workstation supports multiple operating systems, better user experience, multi-functionality and high performance capability.

VMware Workstation virtual machine software
SOME KEY FEATURES OF VMWARE WORKSTATION:
- Restart of virtual machines supported by EFI.
- VMware vCloud Integration with Air.
- Supports screen with high resolution.
- Allocate up to 2GB of video memory to virtual machines.
- Run applications in Windows, Linux and more simultaneously without rebooting.
- Access the virtual machines running on VMware vSphere remote and VMware vCenter.
- Easily build the system virtual machine and then use the drag and drop to upload to VMware vSphere.
- Act as a server to host applications to apply for enterprise organizations.
- Build and test multi-tier applications on a computer a reliable way.
Note: You must register for an account to download the software.
More information about VMware Workstation
USER MANUAL:
After installing, go to Help> Enter Serial Number and click "Het Serial Number" Step 1: Install VMware Workstation (like a normal install other software, every Next is OK, remember to fill Serial number). Step 2: Run Run VMware Workstation and create configuration and install the operating system for virtual machines: you launch VMware-Workstation program, on the main interface of the program, you click the menu File> New> Virtual Machine (Ctrl + N) to conducting initial configuration of the virtual machine. The dialog New Virtual Machine Wizard appears, click Next, select Typical and click Next, select the type of operating system (Guest operating system) and the version of the operating system (Version ) that you intend to want to install on your virtual machine and then click Next, name (Virtual machine name) and choose where to store the virtual machine (Location). Click Next. In the Network Connection select the connection type for each of your needs. If you want to set up an interactive network between physical and virtual machines, then select Use bridged networking connections. Click Next and then select the hard disk capacity of the virtual machine, the default is 8 GB. Click Finish. After creating the virtual machine will also have a full range of equipment such as an ordinary PC, which means you can go to the BIOS (virtual) to set the parameters for the virtual BIOS. The options on the frameDevice :
- Memory: set the amount of RAM for the virtual machine.
- Hard Disk (IDE 0: 0): Data on the hard disk capacity of the virtual machine.
CD-ROM (IDE 1: 0): You selected Use physical drive to use the physical CD-ROM drive of the physical computer. If you want to install the operating system from the image file (ISO) is selected Use ISO image . Experience shows that you should create image files (ISO) for the installation disc, to be able to proceed more quickly.
- Ethernet: You can select the connection type (Network Connection) to fit your needs.
- USB Controller: Option for whether to use the USB connection in virtual machine (default automatically allows use of USB in a virtual machine).
- Sound Adapter: Using default sound card of the virtual machine or physical computer sound card.
Alternatively, you can go to the menu Edit > Preferences to configure more about the Keyboard and Mouse mode, Cursor, hot key transfer effect of keyboard and mouse pointer between the real and the virtual machine (Hot Keys), run in full screen mode or window (Display), the option of RAM (memory), security mode password for the virtual machine (Lockout) ... By default, the amount of RAM for the virtual machine is 128 MB. However, you can also change the configuration of the hardware on the virtual machine by clicking the " Edit virtual machine settings "(in the Commands section on the main interface of the virtual machine) to a dialog box Virtual Machine Settings . In this dialog box, you can change the hardware configuration according to your own needs. Now, you click " Start this Virtual Machine "(in the Commands section on the main interface of the virtual machine) to start install the operating system you want the virtual machine. If the CD-ROM option you select Use physical drive, you insert the operating system CD-ROM drive, the CD contains the operating system is not bootable, you CMOS virtual machine needs to adjust the boot priority mode for the CD-ROM (operation performed similar real machine) by pressing F2 to enter Setup. If the CD-ROM option you selected Use ISO CD image is not required. Note: the keys on the keyboard to be effective in the virtual machine must use your mouse to left-click on the screen of the virtual machine, and to deliver effective keyboard with mouse cursor into real machine back, you press Ctrl + Alt. Step 3: Run the operating system on a virtual machine: To start the operating system on a virtual machine, you can click " Start this Virtual Machine"and manipulate as normal shutdown on the real machine, ie on Start > Turn of Computer -> Turn off .
Similar to the above steps you can create different virtual machines with different operating systems. Good luck.


 Snipping Tool Win 10
2,147
 Sandboxie 5.45.0
2,087
 Acrobat Pro 11
1,907
 Adobe Flash Player 32.0.0.465
2,885
 7 Zip 21.00 Alpha 64bit
2,037
 Malwarebytes Anti Malware 4.3.0.206
1,915
 WinRAR download for PC win 32 bit, 64 bit
3,202
 WinRAR 64bit
2,443
 Google Earth Pro 7.3.2.5776 EN
4,500
 Recuva 1.53.1087 - Recuva file recovery, data recovery free download
42
 Adobe Flash Player 21.0.0.242
2,640
 Setup from USB - Free download and software reviews
2,209
 Windows Doctor - Free download and software reviews
2,151
 Xmanager - Free download and software reviews
2,156
 Sharp World Clock - Free download and software reviews
2,054
 Live Wallpaper Creator - Free download and software reviews
2,149
 Potatoshare Android Data Recovery - Free download and software reviews
2,379
 Windows 10 Firewall Control (64-bit) - Free download and software reviews
2,326
 PC Optimizer - Free download and software reviews
2,230
 Advanced File Lock - Free download and software reviews
1,996
 Google Chrome Free...
167033
 MathType 6.9a -...
79905
 Zalo for PC
29729
 Beach Head 2002 -...
25875
 iBackupBot - Free...
22731
 AnonymoX 2.0.2 -...
22302
 Snipping Tool++...
21095
 Age of Empires 1.0
17183
 Realtek AC97 Audio...
16721
 Citrio...
14658